How to Create a Volume?
Volume is a virtual block storage device that can be attached to a virtual machine (VM) or instance. It provides persistent storage that can be dynamically created, attached, and detached from VMs as needed.
Step 1
Log in to the xconnect portal. (opens in a new tab)
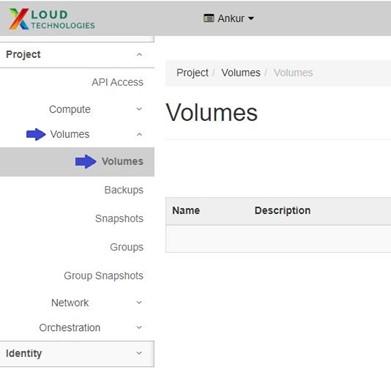
Step 2
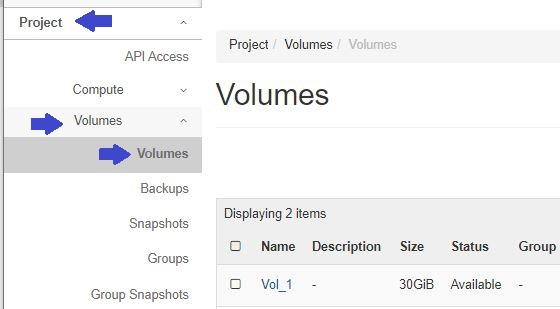
Under the Project tab, open the Volumes tab and click on Volumes.
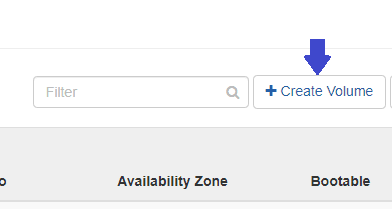
Step 3
Click on the "Create Volume" button.
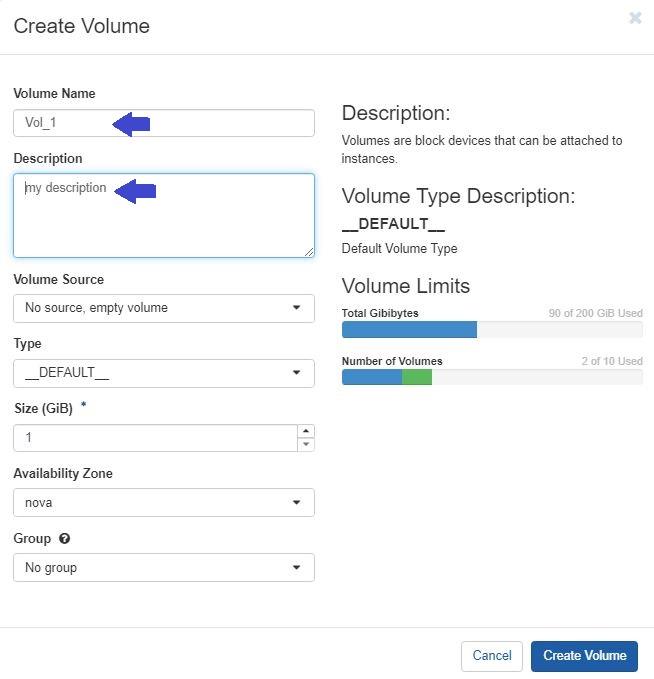
Then specify Volume parameters:
Volume Name: Specify a name for the volume.
Description: Optionally, provide a brief description for the volume (e.g., my description).
Volume Source: Choose one of the following options:
- No source, empty volume: This option allows you to create a volume from scratch without any pre-existing data. It provides a blank slate for you to configure the volume according to your specific needs. You can later attach the volume to a VM and initialize it with a file system or partition table as required.
- Image: When you select this option, you have the additional choice to "Use Image as a source." This means you can select an existing VM snapshot, which serves as a point-in-time copy of a VM's disk contents, as the source for the volume. By using an image snapshot, you can quickly create a volume with the same data as the snapshot. The resulting volume can then be used to launch a new VM with the same configuration and data or attached to an existing VM to access its data.
- Snapshot: This option allows you to choose a specific snapshot from the available list as the source for the volume. A snapshot is a captured state of a VM's disk contents at a particular moment. By selecting a snapshot, you can create a volume that replicates the data stored in that snapshot. This is useful for creating volumes with specific configurations or accessing data from a specific point in time.
- Volume: If you select this option, you can choose an existing volume from the list as the source for the new volume. This allows you to create a copy or clone of an existing volume, which can be useful for creating multiple volumes with the same data or configurations.
Type: Leave this field on __DEFAULT__.
Size (GiB): The size of the volume in gibibytes (GiB).
Availability Zone: By default, this value is set to nova.
Group: It is the group to which the new volume belongs. Choose 'No group' if the new volume belongs to no group.
In this example we are selecting first option:
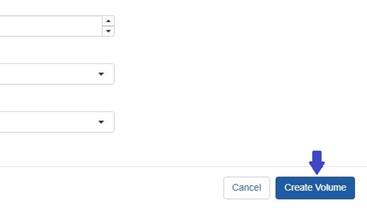
Step 4
To finalize the process,, click on the Create Volume button.
After creating the volume, you can locate it under the Project tab, open the Volumes tab, and click on Volumes.
Once you have located the volume, you can proceed to attach it to a virtual machine (VM) to access the data stored within it.
To know how to attach volume to VM, please refer to this guide