How to create VM snapshot and where is it saved?
A snapshot of virtual machine (VM) is like taking a picture of the VM at a specific moment. It captures the entire state of the VM, including its operating system, applications, and data. This snapshot can be used to create a backup or replicate the VM, allowing you to easily restore or clone it later if needed.
Step 1
Log in to the xconnect portal. (opens in a new tab)
Step 2
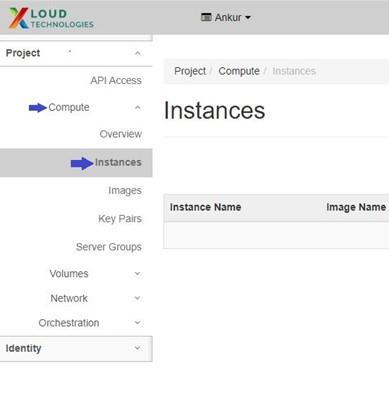
Under Project tab, open the Compute tab and click on Instances.
Step 3
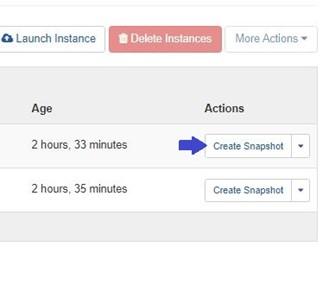
To create snapshot of VM
Click on Create Snapshot button of the VM. System will initiate the process of capturing a snapshot of the VM's current state.
After clicking on the "Create Snapshot" button for the VM, you will be prompted to specify a name for the snapshot.
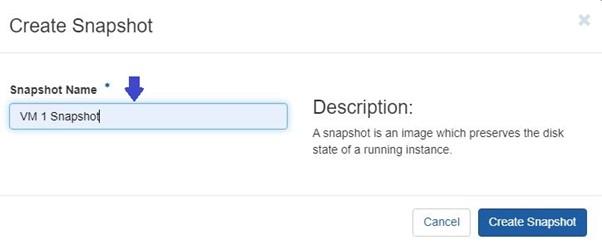
Step 4
Click on the "Create Snapshot" button to finalize the process.

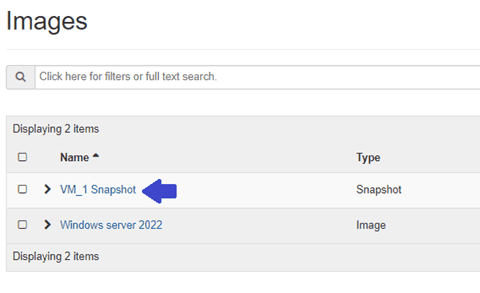
After successfully creating the snapshot, you can locate the saved snapshot in
Under Project tab, open the Compute tab and click on Images.

Note: In case of volume booted VM, creating snapshot of VM will also create a snapshot file under volume snapshot, so do not delete it. The snapshot file serves as a point-in-time copy of the volume's data. This file is independent of the original volume and allows you to restore the volume to its state at the time of the snapshot or create new volumes based on the snapshot. This snapshot file is crucial for preserving the captured state of the volume at the time of the snapshot creation. So, you should not delete it.
To locate this snapshot file, go to Project tab, open the Volumes tab and click on Snapshots.